
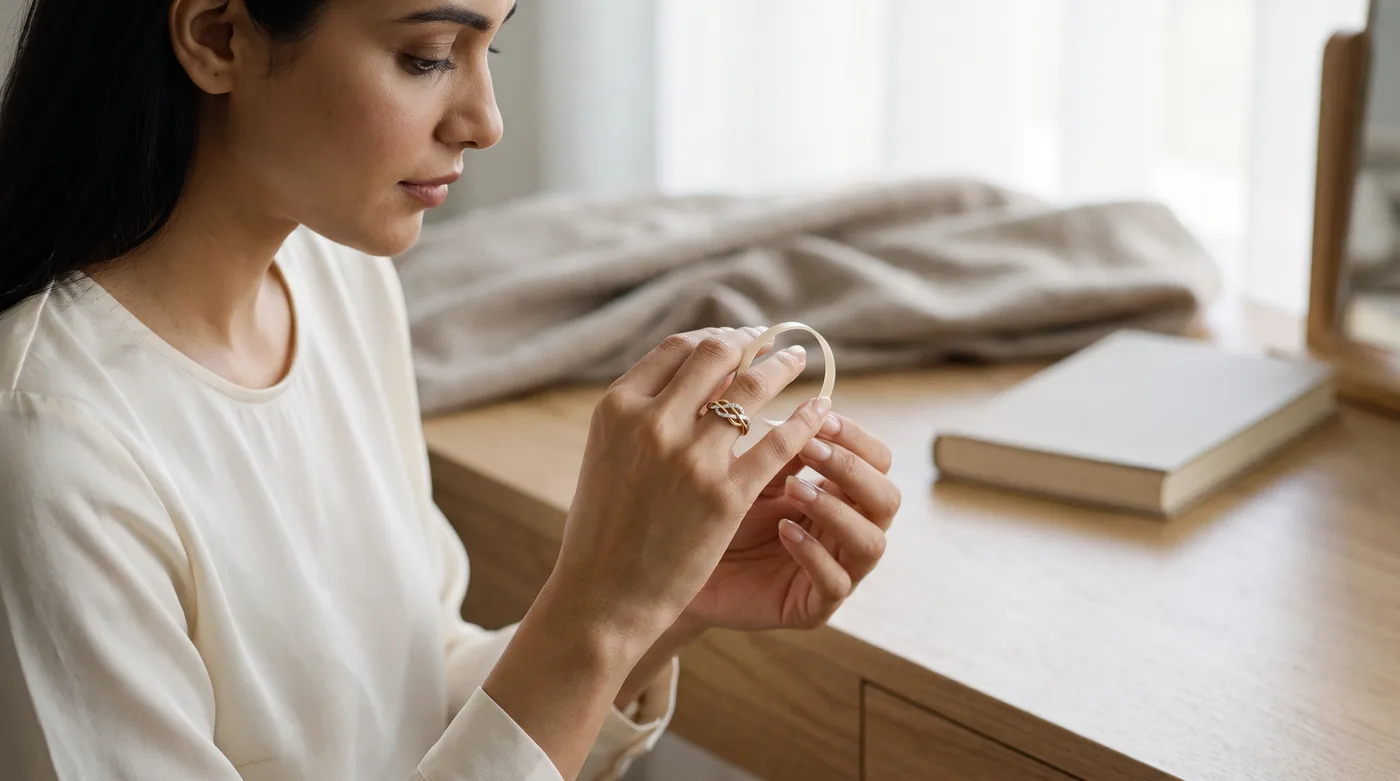
By Vikas, BlueStone Editorial
Looking for how to measure ring size at home? To measure ring size at home, use a ring that already fits the intended finger and measure its interior diameter in millimetres. If you do not have one, measure the finger circumference with a snug paper strip, repeat the reading, and match the result to the seller's Indian ring size chart.
A reusable ring sizer or a jeweller's gauge is the strongest confidence check. Home methods are useful estimates, but the same finger, same hand, knuckle clearance, temperature, band width, and the ring's shape can all change the fit.
TL;DR: Measure in millimetres, never include the ring's metal thickness in an interior-diameter reading, repeat the result at a comfortable room temperature, and check both the finger base and knuckle. If two readings disagree or the design is wide, stacked, expensive, or difficult to resize, ask a jeweller to confirm the size before buying.
How to Measure Ring Size at Home: The Quick Answer
The quickest dependable route is to begin with a ring that already fits the intended finger. When that is not available, measure finger circumference carefully and treat a reusable ring sizer as the stronger confidence check.
Start with the best tool you already have: a comfortably fitting ring for the intended finger, a flexible ring sizer, or a thin non-stretch paper strip and a ruler marked in millimetres.
Measure a fitting ring across its empty centre from one inner edge to the opposite inner edge, passing through the widest point of the circle.
Keep these quick takeaways handy:
- If measuring the finger, wrap the paper at the exact position where the ring will sit, mark the overlap, flatten the strip, and measure the marked length in millimetres
- Repeat the reading at least twice and compare the results rather than trusting a single attempt
- Check that the planned ring can pass the knuckle with gentle resistance and settle at the base without pinching or spinning freely
- Match the millimetre result to the size chart used by the actual seller because country labels and brand charts can differ
- Choose professional confirmation when the reading falls between sizes, the knuckle is prominent, the band is wide, or the ring may be difficult to resize
- Write down the finger, hand, method, diameter or circumference, and final size so another finger or another chart is not used by mistake
What You Need Before Measuring
Good tools reduce avoidable error. Decide whether you are measuring a ring or a finger, use millimetres, and keep the exact intended product and finger in view.
For the existing-ring method, use a ring that fits the same finger and hand, a rigid ruler with clear millimetre marks, and a flat well-lit surface.
For the finger method, use a thin strip of non-stretch paper, a fine pen, scissors, and a millimetre ruler; flexible measuring tape can work if it lies flat without compressing the skin.
Keep these quick takeaways handy:
- A reusable plastic ring sizer or metal gauge set is more reliable than improvised string because it behaves more like a ring as it passes the knuckle
- Avoid elastic cord, thick ribbon, fuzzy thread, or a stretched string because the measured length can change before it reaches the ruler
- Use a ring with a circular interior; an oval, bent, open, or heavily worn ring can give a misleading diameter
- Measure the intended finger rather than assuming matching fingers on opposite hands have the same size
- Work in a comfortable room after your hands have returned to a normal temperature, not immediately after cold water, heat, or exercise
- Keep the exact product page nearby so the result can be checked against its available sizes and seller-specific chart
Method 1: Measure a Ring That Already Fits
An existing ring gives a clean home measurement when it is round, comfortable, and worn on the same finger and hand. The Tiffany size guide also uses interior diameter in millimetres for this method.
Choose a ring that feels secure and comfortable on the same finger and same hand as the new ring will be worn.
Place it flat on a ruler and align one inner edge with zero, then read the straight interior distance to the opposite inner edge through the centre.
Keep these quick takeaways handy:
- Record only the empty opening in millimetres; including the metal on either side measures the outside diameter and produces the wrong size
- Rotate the ring a quarter turn and measure again to check whether the interior is truly round
- Use the smaller reading with caution if the two diameters differ, because the ring may be oval or distorted and unsuitable as a precise reference
- Convert the confirmed interior diameter to circumference by multiplying it by 3.1416, or match the diameter directly to the chart
- If the reference ring is a narrow band but the new design is wide, treat the measurement as a starting point rather than a final size
- For a surprise purchase, confirm that the borrowed ring is regularly worn on the intended finger, not on a thumb, index finger, or the other hand
Ring Styles to Consider After You Confirm the Size
Use these six approved BlueStone designs to compare how different silhouettes may feel on the finger. The Anya Ring and The Quinn Ring offer lighter interlaced directions. The Rafia Ring and The Viperine Twist Ring show different open and twisted forms. The Haily Ring and The Ebony Ring have a broader visual presence, so fit deserves extra attention. Follow each live product page for the actual available sizes and specifications. These examples do not replace a ring sizer or professional measurement.


Method 2: Measure Your Finger Circumference
A finger measurement is useful when no fitting ring is available, but tension and material matter. GIA cautions that string can stretch and paper can change shape, so repeat the reading and use it as an estimate.
Cut a narrow strip of paper long enough to go around the finger without overlapping several times.
Wrap it at the base of the intended finger so it touches the skin evenly but does not leave an indentation.
Keep these quick takeaways handy:
- Mark the exact meeting point with a fine line, then remove and flatten the strip without tearing or stretching it
- Measure from the strip's starting edge to the mark in millimetres and record that number as the finger circumference estimate
- Repeat the process on a fresh strip and compare readings; a difference means the tension or position changed
- Measure the knuckle as well when it is visibly wider than the finger base, then seek a size that can pass the joint and still sit securely
- Treat paper and string as estimates because flexible materials can bend, stretch, shrink, or miss the clearance needed at the knuckle
- Do not pull a measuring strip tight to force a smaller number; a ring must move over the joint and remain comfortable during normal wear
Method 3: Use a Ring Sizer for a Confidence Check
GIA identifies finger gauges and a jeweller’s measurement as the most dependable sizing route. At home, a reusable sizer works best when it must pass the knuckle and settle like the intended ring.
Thread a reusable belt-style ring sizer through its buckle and slide it onto the intended finger with the scale facing outward.
Tighten it until it sits like a ring, secure enough not to fall but loose enough to move over the knuckle without force.
Keep these quick takeaways handy:
- Read the size at the indicator, remove it, wait briefly, and repeat to see whether the same size feels right
- With a gauge-ring set, try the likely size and its neighbouring sizes instead of stopping at the first ring that goes on
- Test the sizer at the finger base and over the knuckle, then move the hand normally to check that it does not pinch or spin freely
- Use narrow gauges for narrow rings and ask for a wide-band gauge when the design covers more of the finger
- A professional jeweller can use finger gauges and a mandrel to reconcile the finger reading with an existing ring
- Take the product's width, interior profile, setting, and stack into account before treating a gauge number as final
How to Calculate Ring Size from Diameter
The calculation checks whether diameter and circumference tell the same story. It does not create a universal size label, so the seller’s chart still decides the final numeric or letter size.
Example: 17.2 × 3.1416 = 54.04 mm, which is about 54.0 mm.
Diameter is the straight line across the ring's empty centre, while circumference is the distance around the inside of that circle.
For a round ring, calculate circumference in millimetres with the formula: interior diameter multiplied by 3.1416.
Keep these quick takeaways handy:
- A 17.2 mm interior diameter gives about 54.0 mm circumference because 17.2 multiplied by 3.1416 equals 54.04
- BlueStone's official chart maps this representative pair, 17.2 mm diameter and 54.0 mm circumference, to Indian size 14
- Round sensibly to the precision shown in the seller's chart rather than inventing a size between listed options
- Do not reverse diameter and circumference; a circumference value will be a little more than three times its matching diameter
- The equation checks your measurement but does not replace a chart because the numeric size label depends on the sizing system
- If the calculated circumference and directly measured finger circumference disagree materially, repeat both methods or use a professional ring sizer

Finger Ring Size Chart for Indian Sizes
The chart below uses representative values from BlueStone’s official Ring Measuring Guide v2. It is designed for quick comparison, while the linked guide remains the complete source for sizes 6 to 30.
| Indian size | Interior diameter | Finger circumference |
|---|---|---|
| 6 | 14.6 mm | 45.9 mm |
| 8 | 15.3 mm | 48.1 mm |
| 10 | 15.9 mm | 50.0 mm |
| 12 | 16.5 mm | 51.8 mm |
| 14 | 17.2 mm | 54.0 mm |
| 16 | 17.8 mm | 55.9 mm |
| 18 | 18.4 mm | 57.8 mm |
| 20 | 19.1 mm | 60.0 mm |
| 22 | 19.7 mm | 61.9 mm |
| 24 | 20.3 mm | 63.8 mm |
| 26 | 21.0 mm | 66.0 mm |
| 28 | 21.6 mm | 67.9 mm |
| 30 | 22.3 mm | 70.1 mm |
Use this finger ring size chart only after deciding whether your number is interior diameter or finger circumference.
The representative values come from BlueStone's official Ring Measuring Guide v2 and use millimetres throughout.
Keep these quick takeaways handy:
- Find the closest row, then confirm that the same Indian size is offered on the exact product page you plan to buy from
- When a reading falls between rows, BlueStone's guide recommends the larger listed size, but a wide or unusual design still deserves a fit check
- A chart match is most reliable when the reference ring is circular, the ruler passes through the centre, and the finger reading was repeated
- Do not use bangle notation such as 2.2 or 2.6 for finger rings because bangle sizing measures a different object and body path
- International labels may map the same millimetre measurement to a different number or letter, so use dimensions as the common reference
- Save both the millimetre measurement and the Indian size rather than recording the size label alone
How Should the Right Ring Fit?
A correct fit solves two tasks at once: it passes the knuckle and stays secure at the finger base. Test both before treating the chart result as final.
The ring should pass over the knuckle with gentle resistance and settle at the intended position without force.
At the finger base, it should make even contact without a deep indentation, throbbing feeling, or need to twist constantly for relief.
Keep these quick takeaways handy:
- A secure ring may rotate slightly during normal movement, but it should not spin freely or slide toward the fingertip when the hand hangs down
- Try making a relaxed fist and opening the hand; the ring should remain comfortable through ordinary movement
- Check the fit again after several minutes because a ring that initially feels acceptable can become noticeably tight or loose
- Compare comfort at more than one time of day and on more than one day when the purchase allows
- Cold or wet fingers can measure smaller, while heat and activity can temporarily change how snug the same ring feels
- If removing the ring requires force or the ring threatens to slip off with light movement, do not treat the size as confirmed
Common Ring Measurement Mistakes
Most home errors come from measuring the wrong distance, finger, hand, or material. A second method can reveal the problem before it becomes a wrong order.
Measuring the outside edges of an existing ring adds the metal thickness and overstates the diameter.
Using a ring from a different finger or the opposite hand assumes sizes that may not match.
Keep these quick takeaways handy:
- Pulling paper or string too tightly compresses the skin and creates a smaller circumference than a real ring can comfortably use
- Using stretchy or thick material changes the path around the finger and makes the mark difficult to reproduce
- Taking only one reading hides errors caused by angle, ruler position, strip tension, temperature, or time of day
- Ignoring the knuckle can produce a ring that fits the base but cannot be put on or removed safely
- Measuring a bent or oval ring as though it were perfectly round breaks the diameter-to-circumference calculation
- Copying a size label from another country or brand without comparing millimetres can map the same finger to the wrong option

How Band Width, Knuckles, and Stacking Change the Fit
GIA’s sizing benchmark treats narrow and wide rings differently because the amount and shape of contact matter. The same numeric size can therefore feel different across designs.
A wide band contacts more skin than a narrow ring, so the same numeric size can feel snugger even when the interior diameter is similar.
GIA's technical guidance separates narrow gauges for rings about 1 to 4 mm wide from sizing methods used for wider bands.
Keep these quick takeaways handy:
- Two or more rings worn as a stack behave like a wider combined band and should be tested together when possible
- A prominent knuckle creates two fit requirements: enough room to pass the joint and enough security at the narrower finger base
- Tapered bands, convex interiors, open shanks, and raised settings distribute contact differently and may not feel like a plain even-width band
- The dominant and non-dominant hands can differ, so measure the exact hand rather than mirroring a result
- A top-heavy ring may rotate even when the base size is close, which can require design-specific adjustment rather than a guess at a smaller size
- Choose the design first, then confirm its width and interior profile with a jeweller when fit tolerance is small
When to Visit a Jeweller for Ring Sizing
Professional measurement is the sensible next step when geometry, fit tolerance, or conflicting readings make a home estimate uncertain.
Ask a jeweller to confirm the size when the existing-ring, finger-circumference, and reusable-sizer methods do not agree.
Use professional gauges when the knuckle is much wider than the finger base or a standard size spins at the base.
Keep these quick takeaways handy:
- Request a wide-band measurement for broad rings, stacked sets, or multiple bands intended to be worn together
- Bring the actual reference ring if it is oval, tapered, convex, open, or top-heavy so the jeweller can assess its geometry
- Confirm before buying an eternity, full-set, channel-set, or intricate design because some constructions can be difficult to resize
- Seek a professional fit if swelling, injury, arthritis, or another hand change makes the current size unpredictable, without relying on online sizing advice for a health issue
- For a surprise gift, bring a ring known to fit the intended finger and tell the jeweller which hand and finger it belongs to
- Treat professional sizing as a confidence step when a wrong size would be costly, inconvenient, or hard to correct
A Final Ring Size Checklist Before You Buy
Use this checklist to carry the measurement into a real buying decision without losing the finger, hand, unit, chart, or design context.
Confirm the exact finger and hand on which the new ring will be worn.
Record whether the number is interior diameter or finger circumference and keep the unit in millimetres.
Keep these quick takeaways handy:
- Repeat the measurement at a comfortable room temperature and compare at least two readings
- Check the knuckle as well as the finger base and perform the gentle-resistance fit test
- Match the measurement to the chart used by the actual seller and product rather than relying on a generic size label
- Review band width, stack plans, interior profile, top weight, and whether the design can be resized
- Choose the larger listed BlueStone size when a simple measurement falls between chart rows, then seek confirmation if the design changes the fit
- Pause and ask a jeweller when readings conflict or the purchase has little tolerance for error
How to Use This Guide Before Buying a Ring
Keep the millimetre measurement, finger, hand, method, and intended ring together in one note. Match the result to the exact product chart, review design width and interior shape, and confirm the fit professionally whenever the home methods do not agree.
More BlueStone Ring Fit Guides
Continue with BlueStone’s guide to why ring size changes, learn how ring width affects fit, understand the consequences of a wrong ring size, and use the official BlueStone Ring Measuring Guide v2. For a technical professional reference, see GIA’s finger and ring sizing benchmark.
Frequently Asked Questions About Measuring Ring Size at Home
What is the most accurate way to measure ring size at home?
The strongest home method is a reusable ring sizer or a comfortably fitting ring measured across its interior diameter in millimetres. Repeat the reading and compare it with the exact seller's chart. For the highest confidence, especially with a wide or intricate ring, ask a jeweller to verify the result with finger gauges and a mandrel.
How do I use a finger ring size chart?
First identify whether your measurement is finger circumference or a ring's interior diameter. Find the closest millimetre value in the matching chart column, then read the Indian size on that row. Confirm that the same size system appears on the actual product page, because international numbers and letters can differ.
Can I measure ring size with a ruler?
Yes. Place a round, well-fitting ring flat over a millimetre ruler and measure the empty interior from one inner edge to the opposite inner edge through the centre. Do not include the metal thickness. Rotate the ring and repeat; differing readings suggest the ring is oval and should not be your only reference.
How do I calculate circumference from a ring's diameter?
Multiply the interior diameter in millimetres by 3.1416. For example, 17.2 mm multiplied by 3.1416 is about 54.0 mm circumference. Use that number only as a cross-check, then match either diameter or circumference to the size chart supplied by the seller.
Should I choose the larger ring size when between sizes?
BlueStone's official measuring guide recommends choosing the larger listed size when a simple reading falls between sizes. Treat that as a starting rule, not a universal substitute for fit testing. Band width, stacking, a prominent knuckle, and the ring's interior shape can change which option feels secure and comfortable.
Does a wide ring need a different size?
A wide ring can feel tighter because more metal contacts the finger. GIA distinguishes narrow gauges for even-width rings around 1 to 4 mm from wide-band sizing tools. If the chosen ring is broad or will be stacked with another band, test the intended width or ask a jeweller to confirm the fit.
Why does the same ring fit differently during the day?
Finger size can change with temperature, activity, moisture, and time of day. Avoid measuring cold or wet fingers, and compare readings at different comfortable times or on different days. A size is more trustworthy when repeated measurements agree and the ring passes the knuckle with gentle resistance.
When should I ask a jeweller to confirm my ring size?
Seek confirmation when home methods disagree, the knuckle is prominent, the band is wide, several rings will be stacked, or the reference ring is not round. Professional sizing is also wise for full-set or intricate designs that may be difficult to resize, and whenever a wrong fit would be hard to correct.
Conclusion
The safest answer to how to measure ring size at home is to combine methods. Measure a circular ring that already fits or repeat a finger-circumference reading in millimetres, compare the result with the exact seller chart, and test knuckle clearance. Use a ring sizer or jeweller when readings disagree, the band is wide, or the design may be difficult to resize.
Leave a Reply